Sunday 25 December 2016

Saturday 24 December 2016

Six by six - challenge accepted

Over on his blog Kaptain Kobold has laid down a challenge. He wonders why a lot of online challenges revolve around painting and modelling. What about a challenge around playing? This makes much more sense to me, as painting, with the exception of the second half of last year, is not something I need extrinsic motivation for, but I never seem to get many games played considering how much time I spend behind a paintbrush.

The idea is to choose 6 rulesets and play six games of each over the course of the next year. I can do that! It will also help that some of the rulesets that I choose will actually be homegrown and need playtesting and development. So my choices of games will be:

DBA 3.0
Vikings vs Anglo-Saxons. I've been developing a mini-campaign for these guys.
Honours of War
A Seven Years War game in action
Clobberin' Time
Time to develop my own universe of supers
Lord of the Rings for Star Wars
Continuing to work out adaptations and drawing up a qrs which includes the necessary stats.
Crimean War rules
Adapting Neil Thomas' nineteenth century wargames rules.
Broken Legions
The actual Soldiers of the Eagle warband looks a bit different to this.
A couple of things from this list to note. The first is that I've decided to give the Keith Flint's Osprey rules for the Seven Years War a decent try out. I reread them in the last couple of days and quite like what I've read, so they deserve further investigation. 
I love the atmosphere of Broken Legions, and am very curious as to how it will play. It looks like the kind of game that will need several goes to get the hang of.
The Crimean rules are well formed and may need a little tweaking here and there, but a small six game campaign would be quite nice to write up.
I played one game of Star Wars using the Lord of the Rings rules as a basis and found they worked well. I now need to start working on adding in the force and lightsabre rules.
Clobberin' Time is the brainchild of Kaptain Kobold himself, and I look forward to playing around with his rules some more, while developing the NDC universe a little more.
I managed 6 games of DBA last year anyway, so I don't see it as being a challenge for 2017.
Flames of War v.4 is not in here, but I know I will be playing it on club nights anyway. I figure I would rather use the challenge to play the games that I don't get played often enough.

By focusing on these periods to game I also hope to focus my painting to only these projects this year. I still have leftover painting for other people from the second half of last year that I need to catch up on, so limiting myself to some extra Crimean Russians, a few Broken Legions warbands and some DBA armies seems like a good idea. If there is time at the end of the year and I have finished my painting for everyone else, I will start painting for Muskets and Tomahawks. At the moment I am just finishing off the last few Seven Years War units.

The WWI project will now slip back to 2018. When I do this, I want to do it all together, starting with the FoW Great War Brits, Germans and French, and then moving into the 1914 armies.

Great plans. Expect everything to change...

Nate

Thursday 22 December 2016

One Hour Jutland

Having finally finished work for the year I have been able to get the paints out again over the past couple of nights. I started the last couple of Seven Years War battalions but then changed tack and thought I'd slap some paint on my 1/3000 WWI ships. I found and downloaded Martin Rapier's WWI Jutland One Hour Wargames variant, and selected the models I'd need to play this, 16 in total.

This morning I laid out my Sea board and started playing out the game:
The battlecruiser fleets move onto the board,
The first turn over and some major damage done to the Von der Tann. Blue gems indicated 6 hits and reduced speed and gunnery.
Revenge is not far away. Von der Tann fires at the Inefatigable. A natural 6 and the British Battlecruiser must roll again. A 5 and the magazine explodes! First blood to the Kriegsmarine!
The German main fleet arrives on the board.

Von der Tann has taken 12 hits - indicated by the white smoke. The German cruiser fleet is on the verge of destruction and begin to crawl their way south.
And the Royal Navy battlefleet appears from the North-West.

The main battlefleets steam towards each other, but the Germans unleash salvos on the withdrawing British cruisers before they meet.
The Calliope is destroyed. 2-0 to the German High Seas Fleet.
As the main fleets pass each other the Royal Navy seems to be getting the better of the gunnery duel.
That's as far as I got before being interrupted but with 7 turns left it is still very much anyone's game. It was nice to get some ship models on the table and to have such a simple set of rules to play with. I'm not a natural naval gamer and the thought of having to bracket an enemy and then calculate specific damage to aft turret 2 makes me cringe. I do have a soft-spot for dreadnoughts (and triremes - more on that at a later date) though, and appreciate getting the chance to play an enjoyable and fast game with them.
Apologies for the amount of shiny in the photos. It is a very reflective playing surface. But I suppose the sea is a bit like that really.

Nate

Friday 16 December 2016

Rogue One gets the tick (no spoilers)

Despite being so badly burned by the abomination that was episode VII, I remained tremulously optimistic about the next Star Wars movie to be made under the auspices of the mouse. Surely Rogue One would not be a derivative and incoherent mess like the Force Awakens? Then yesterday I saw a review online that gave it three stars and said that it was essentially a movie of callbacks and incoherence. Noooooo! Should I bother? Would I just leave feeling emptier than when I went in? I gritted my teeth and purchased my ticket...

And I'm bloody glad that I did. I don't know what that reviewer had stuck up his arse, but this is a good movie. It is what Episode VII should have been. It is very coherent. It does have callbacks, but they add rather than detract. The humour used fits well every time. The characters are developed archetypes. They have this in common with the Lucas Star Wars movies. This is something that episode VII did so badly, as it just didn't develop those archetypes. With the exception of Kylo Ren all of the Episode VII characters were bland, pointless and boring. He was annoying, but at least he had that in common with Anakin. Whiny Skywalkers are a stock aspect of Star Wars.

So I heartily recommend Rogue One. I walked out smiling, so different to a year ago when I looked at my mate as the credits rolled and said 'What the fuck was that?' While I'm at it, for those that don't get why I'm so anti- Episode VII, I found a video on Youtube that does a good job of explaining a lot of why I thought it was rubbish. It is long, but it has to be in order to point out just how awful the force awakens truly is. I'm no great fan of Episode 1 (although I will take on anyone that says that Episode 2 and 3 weren't as good as the original trilogy any day), but at least it was coherent.


Thursday 10 November 2016

Seven Years War

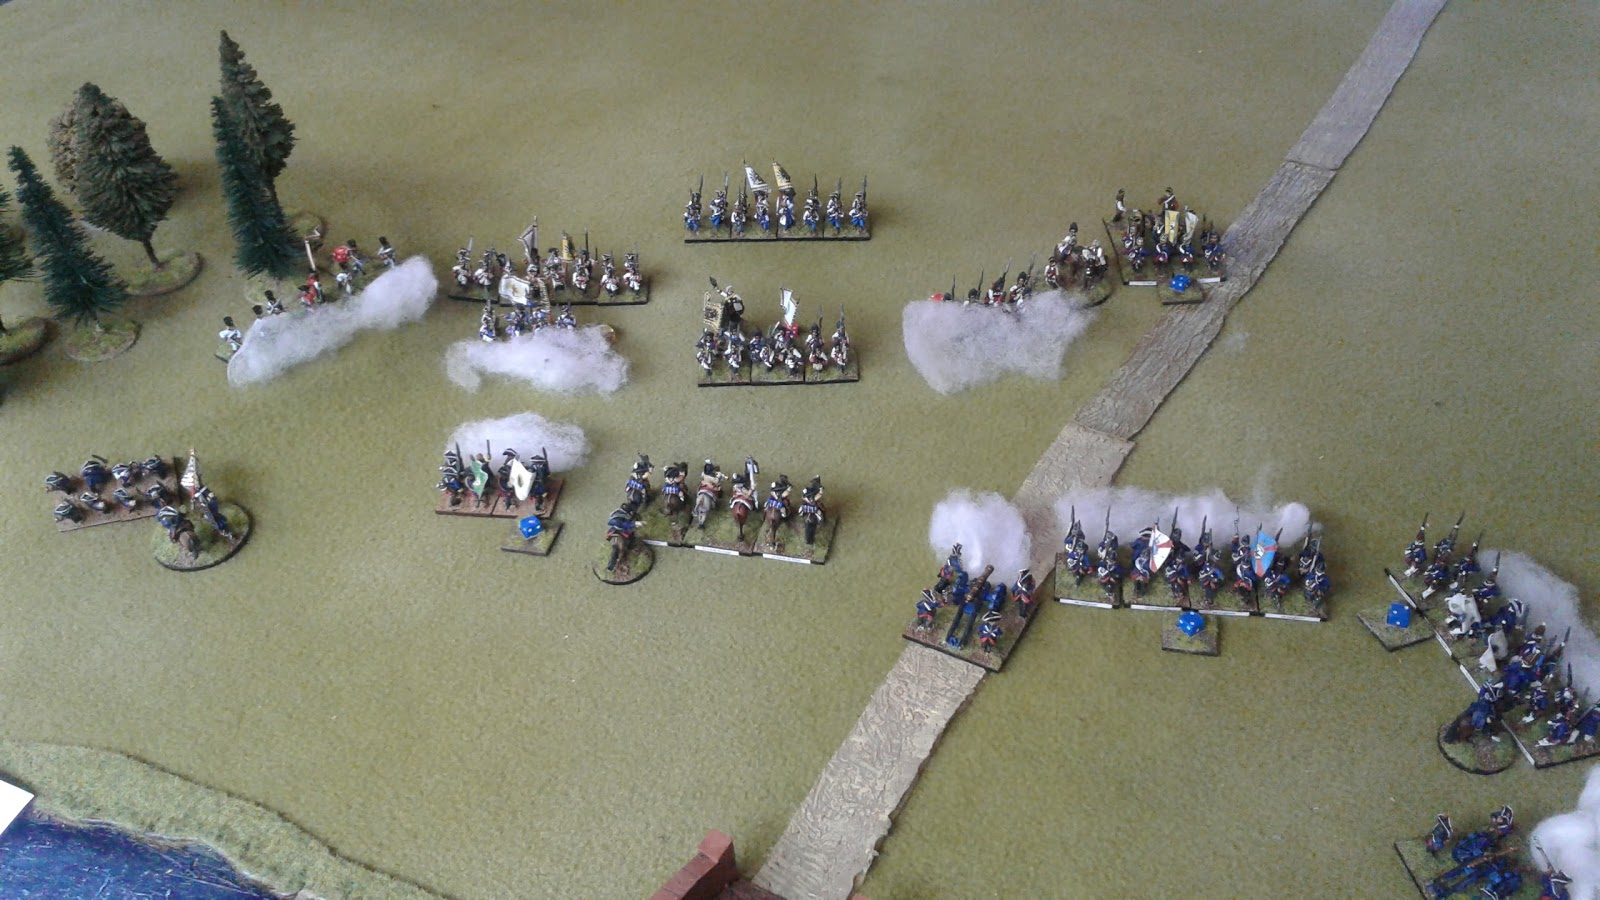
I haven't been totally idle over the past couple of months but I have been quite distracted by work, family and other things so progress on the painting front has been a bit slow. I decided to work on one of my own projects to restore my painting mojo, and here it is - the Seven Years War. Spotted in the post before this one in a small battle, I have since expanded the Prussians and Austrians further.

First up the Prussian army. The goal for this force is:
12 infantry regiments (1 x Guard, 3 x Grenadier, 4 x Musketeer, 3 x Fusilier, 1 x Garrison)
3 light infantry regiments (2 x Freikorps, 1 x Jager)
8 Cavalry (3 Cuirassiers, 3 Dragoons, 2 Hussars)
4 Artillery (3 medium guns, 1 howitzer, 4 limbers)
12 casualty markers
7 generals, assault pioneers

I'm most of the way there, I still need to paint 1 Dragoon, 1 Cuirassier, 1 Hussar, 1 fusilier and 1 grenadier regiment and 2 limbers.

The assembled Prussian army - more to come.
The Austrian force has:
12 infantry regiments (3 x Grenadier, 6 x German musketeer, 3 x Hungarian musketeer)
4 light infantry regiments (all grenzer)
8 Cavalry (3 Cuirassiers, 3 Dragoons and 2 Hussars)
4 artillery (2 medium guns, 1 heavy gun and a howitzer, 4 limbers)
12 casualty markers
7 generals, assault pioneers

I'm a bit further ahead here, needing to finish a Hussar, a Hungarian regiment, and 2 limbers.

The Austrian army is almost totally ready


 To be fair, the majority of the Austrian army and the Prussian cavalry were received already painted - I just needed to rebase them. The Prussian infantry and all of the light battalions, the casualty markers and the limbers are the main figures that I've painted for the project.
Half of the Prussian army a little closer up.

The other half of the Prussians.
 Everything is organised around 16 infantry and 8 cavalry to a unit. This is my ideal unit size. Not too small to represent a unit, but not so large that I feel I'm wasting figures. I'd rather have more units than bigger battalions. The way I figure it, 3-4 regiments is 48-64 figures, so a brigade is about the same size as a Peter Young/Charles Grant old school battalion, but it makes more sense to me to have two brigades in independent action than two battalions. Plus I get to paint a lot more different facings and uniforms and more flags which is just more fun for me.
For rules I've looked at Honours of War, Minden Rose and Die Kriegskunst, but I've rejected them all in favour of my amended Neil Thomas rules. These just work so well for me, and I've come to know them really well. They look quite different to his original Horse and Musket Rules from Introduction to Wargaming, but some core mechanisms can still be recognised, such as units pivoting on the centre and the artillery fire.
Half of the Austrian army
 I had originally thought a unit would be a battalion, but on reflection I decided to go with a regiment. Again, it meant painting a greater variety of uniforms, but it also meant that a unit of grenadiers actually represented 2 battalions made up of the grenadier companies of 4 different regiments, so the aesthetic pleasure of researching grenadier uniforms and painting four figures for each doubled the pleasure.
And the other half. You'll note that there is more cavalry and more light infantry than the Prussian army.
The casualties are disordered markers, which are applied on the first loss of a morale test. They can be rallied off by a general (but this hinders his ability to give orders to his brigade), but if a second morale test is failed while disordered the unit routs. The rules seemed to be working OK in the last game that I had, making tests harder to pass unless units were in support.
If I manage to get a couple more games played I'll publish the rules as a separate page for free download.
I owe Geoff a painted unit of 9 Years War cavalry for all of the figures that he gave me, so that will be coming sometime in December I hope.

Nate

Sunday 18 September 2016

Blundering through Bohemia

Today I glued some Prussian Musketeers to their bases and thought I'd break out the whole 7 Years War collection for a game.
I rolled a d6 and a d10 and consulted One Hour Wargames for a scenario. I rolled up scenario 5, secure the bridgehead. I then rolled on the table to discover the composition of the forces. Blue - Prussia - got 3 infantry, 2 artillery and a cavalry unit. Austria - red - got 4 infantry, 1 skirmisher and an artillery. I then doubled the result for the infantry and the cavalry, and set up the table for a solo game.
The set-up has a single unit (doubled to 2 in my case) protecting the bridge of a river crossing. There is a wood to their left and a hill to their front-right. (hard to see in the bird's eye view)
In turn one the first Austrian units arrive in a random location. Both happened to appear behind the wood.
In march column they begin to head for the bridgehead.
The first Prussian reserves arrive - an artillery battery. I still have to buy some limbers.
Turn 3 and Austrian infantry arrive on the road opposite the bridge. The first Prussian infantry reinforcements arrive as well.
Turn 4 and the Austrian light troops make their way to the woods. The Austrian infantry begin to move into position.
Turn 5 the Prussian gun gets into action, and first blood goes to Alte Fritz's boys.
Reinforcements are all on the board by turn 6, and the Prussians pour across the bridge. The two Musketeer regiments engage the light troops threatening the Prussian left flank. Out of picture on the right the last Austrians start their slow advance to join the action.
Heavily outnumbered the Prussian combined grenadiers in the centre hold their ground.
The Prussian cavalry forms up, the Dragoons on the right flank, the Garde du Korps Cuirassiers in the centre. The Prussian combined grenadiers manage one last defiant volley - they have done their job! On the right the artillery and Garde Grenadiers open up to devastating effect on the Austrians.
With the Grenadiers gone the Prussian fusiliers are left in no-man's land. The Garde du Korps smash into the Austrian grenadiers and drive them back, then retire. The 18th Regiment charges into the Grenzers on the left.
Isolated well to the front of the main Prussian lines, the 47 Rohr regiment chooses to attack rather than withdraw!
On the left the Austrian grenzers defend stoutly.
On the right the Austrians get themselves into position to release some volleys.
The Dragoons move around to prepare for a charge.
All Prussian troops are now engaged. The edge of the woods has been cleared of one Grenzer regiment, but another awaits.
It only just manages to deploy and release a blast of grape, but it is too late, and the Austrian artillery is destroyed by the Rohr regiment. It happened to be just 6cm away form support - one cm too far for it to count!
On the right the Dragoons are pushed back, but the Prussian firepower continues to whittle away the Austrian attack.
The Garde du Korps charge again and the Austrian grenadiers are destroyed. The Batthyanyi Regiment has turned to face the Rohr regiment nad now has it's flank open.
The Grenzers are chased back, while the Austrian Starhemberg regiment attempts to break through the Prussian Musketeer Regiment 10 Pannewitz.
On the right volleys continue to be exchanged.
Last turn and the Starhemberg regiment breaks the Prussian 10th. But the Austrians are now spent.
As the battle ends Austrian victory remains elusive.
The 7 Years War armies are mostly Old Glory 15s, and were given to me by Geoff a few months ago. I've spent some time here and there rebasing them to fit my organisations. They were pretty much all painted - I am responsible for the light troops, a few of the cavalry and the 2 Prussian musketeer regiments that are a combination of Old Glory figures and Lancashire that I bought to make up the numbers. I have to say that I love this period for wargaming, probably more than any other horse and musket era, and it is fantastic to see the troops arrayed n the table.
The rules are adapted Neil Thomas Introduction to Wargaming rules, and have a few holes in them, which I've set about rectifying this afternoon. Mostly around morale and support, as the Ausrians really got no benefit from being very well deployed for support on their right flank. I'm also not sure about the 'super-fusiliers' that managed to be isolated and still fight like demons. Despite this, the rules gave a really pleasing outcome, and an enjoyable game. I'll complete the basing of the Prussians tonight and I look forward to another similar scenario soon.

Nate

Saturday 3 September 2016

Time to sit back, have a beer, and invade England.

Or more accurately, Wessex.
It being the end of the week I felt another solo DBA game was in order, and this time I rolled out the Anglo-Saxons and Vikings, the vast majority of which landed on my doorstep as a fantastic gift from young Geoff down in Christchurch.

The dice off for aggression was initially even, but a reroll confirmed that the Vikings would be attacking, so the terrain set-up was arable. I decided the Anglo-Saxons would take a hamlet, a woods, a road and river - as I have not yet used rivers in DBA 3.0 and wanted to test them out. As this is a solo game, all terrain is randomised, and it turned out that the wood ended up in the same quarter as my BUA, which meant it didn't fit and had to be discarded.

I was looking forward to this match-up, because with the +1 flank bonus for spear supported by either spear or blades, it made the Anglo-Saxon line an even match to the Viking Blades. They just had to hold that line.

The Vikings deployed along the river in columns, just in case I rolled a 5 or 6 for the nature of the river, and planned to cross it quickly and get to grips with the enemy. The Anglo-Saxons deployed in a solid line with a couple of spear and two hordes in reserve.

Initial deployment with the Vikings in column.
It turned out that the river was paltry, and the Vikings surged ahead - those on the road getting a free turn which enabled them to deploy immediately.

The Saxons advanced and dispatched their spear reserves to extend their line prior to contact. The Vikings also moved into a solid line. This was shaping up to be a hard fought slog.

The Viking skirmishers moved to prevent the Saxon right-hand spear from joining the line, and surprisingly also forced a recoil on them.

The battlelines crashed into each other, and an Anglo-Saxon spear element was destroyed in the first round of combat.

Now the battle ebbed to and fro, all order disintegrating on the Anglo-Saxon left (to the right in this picture)

The Vikings lapped around the Anglo-Saxon flank and another element of blades was destroyed. The Anglo-Saxon and Viking generals continued to slog it out in the centre.

The Vikings also began to press forward on their left.

A horde was detached to mount a last minute delaying action on the Anglo-Saxon left.

The Vikings now managed to wrap around the Anglo-Saxon right flank and killed their fourth Anglo-Saxon element.

In the centre the Anglo-Saxon general realises he must retreat now or never.
 This was a good game, and enabled me to get used to some of the new aspects of DBA 3.0 compared to what I was used to in 2.2. The most important one was the pursuit by blade elements. This effectively means that once you have committed a blade element to battle against an infantry opponent it will remain committed until it is either victorious or destroyed. I'd sort of noticed this with the Polybian Romans, but as I've only taken 4 blade elements in that list, and they were faced with more cavalry, it had not really sunk in for me. In this case, with two all-infantry forces and a Viking army which is virtually all blade, the lesson was clear.
I was also pleased with the shape of the battle, which ended up being a Dark Ages version of Cannae. The Viking plan to distract the right of the Anglo-Saxon line with the psiloi was a good one.
I'm a bit gutted that the hordes didn't get into the fight - I've never used hordes before. I might put them in the front-line next time.
Way back in issue 2 (I think it was) of Battlegames, Dan Mersey wrote an article which was a campaign system for invading Scotland in a day. I think I might play it out with a Viking theme and see how it goes.

And now, just some pictures of the camp elements, which I received for my birthday last month:
Viking Longboat settled on a very long and very narrow inlet... 
Saxon camp with drunken priest
The Anglo-Saxon hamlet which counts only as rough going. Buildings are from the Usborne 'Make this Medieval Village' book.
Alongside the camps I have started getting into my painting for Craig, which has been delayed while I went through a painting slump. I'm halfway through some Battlefront Germans which I hope to have finished by next week. Then it is prelim exams, so once again my attention will be caught by real life. I do hope to have a few more posts in September than I did last month though!

Nate